
 |
| Litttle Lamb Lissette by Marla L. Niederer |
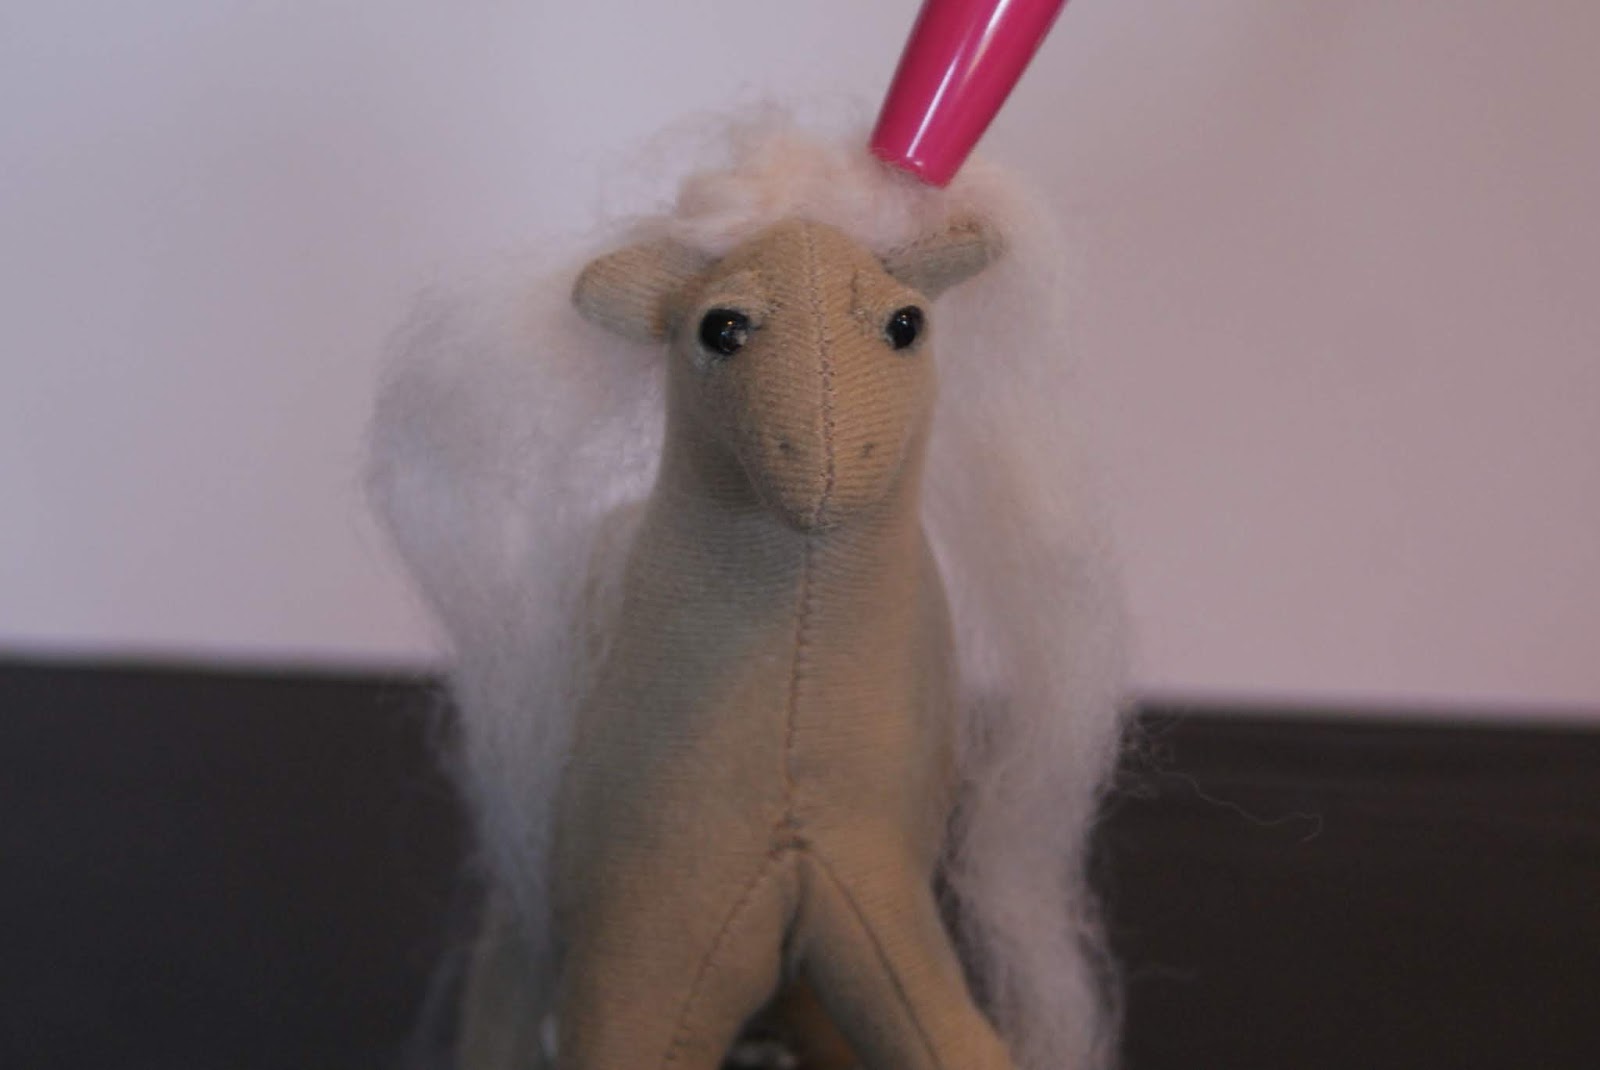
1. Take a piece of the wool roving in a color of your
choice and lay it over the lamb’s head.
Using the needle felting pencil tool, start inserting the needle in and
out of the wool onto the lamb so the fibers of the wool lock inside of the lamb
with the stuffing.


2. Keep using the needle felting tool to attach the wool
onto the top of the head where you want it to go. By inserting the needle in and out of the
head you will also be pushing the fibers down to create a nice “fleece” effect.


3. Add more wool under the chin of the lamb and needle
felt it on.


4. Keep adding wool and needle felting it onto the neck
area of the lamb.


5. Add additional wool to needle felt onto any areas that
need it on the head and neck area.


6. Add wool more wool roving over the back. Needle felt the roving on.


7. Add more wool roving to the rest of the back of the
lamb. Needle felt it on.


8. Add some wool roving under the tail and around the top
of the legs. Needle felt on.


9. Add some wool roving onto the tail. Needle felt on.


10.
Add some wool
roving around the legs. Needle felt on.


11. Pour yourself a nice cup of tea and admire your good work!
Part Four of Little Lamb Lissette will be added to the Tutorials page next week. I hope you have been enjoying making your own Little Lamb Lissette.
 |
Current Online Classes |
 |
Self-Study Doll Making Classes |
 |
Free Tutorials |
 |
About Me |
No comments:
Post a Comment